It’s been said that you can only get a good pint of Guinness in Ireland, and maybe that’s because of our strict process. Here are the six steps to pouring a good feckin’ Guinness.

Any Irish person will tell you; there’s nothing worse than being handed a pint of the black stuff that has been poured all wrong.
From the get-go, we silently observe as the barman prepares our pint, and god forbid he doesn’t follow the strict protocol because our blood begins to boil.
It may sound a little over-reactive or exaggerated, but it’s true. Most of us Guinness drinkers have had that feeling at some point in our lives, especially when abroad.
We take our Guinness very seriously, and that is why there is a strict protocol to pouring the perfect Guinness, something every barman the world over needs to know.
Don’t fret; we are here to ease all your troubles, well your Guinness troubles anyway as we explain the six steps to pouring a good feckin’ Guinness.
1. First step – clean and dry

Well, the first step is relatively straight forward, or so you’d think.
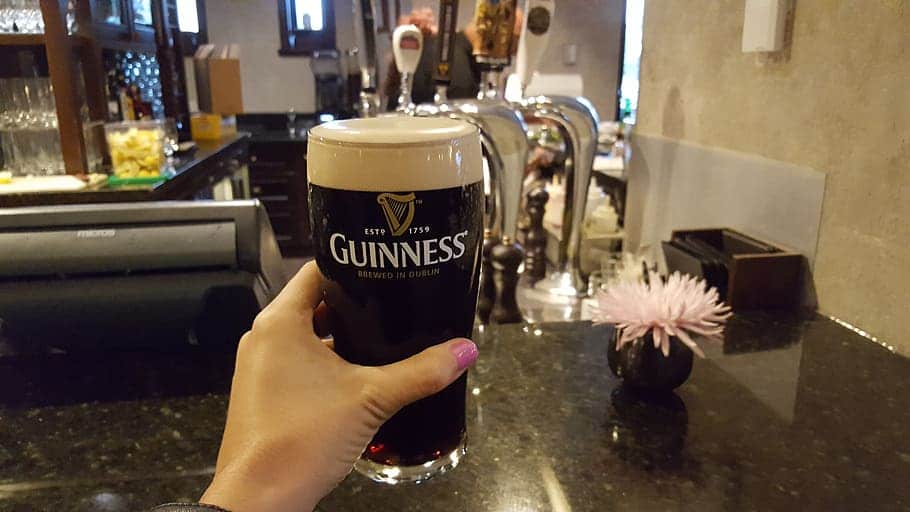
The perfect pint begins with the right glass, and by right we mean clean, dry, and preferably 20oz. Whether or not it has Guinness written on it is purely up to you, although the Harp on the Guinness glass acts as a guideline for the future steps.
2. Next step – it’s all about the angle
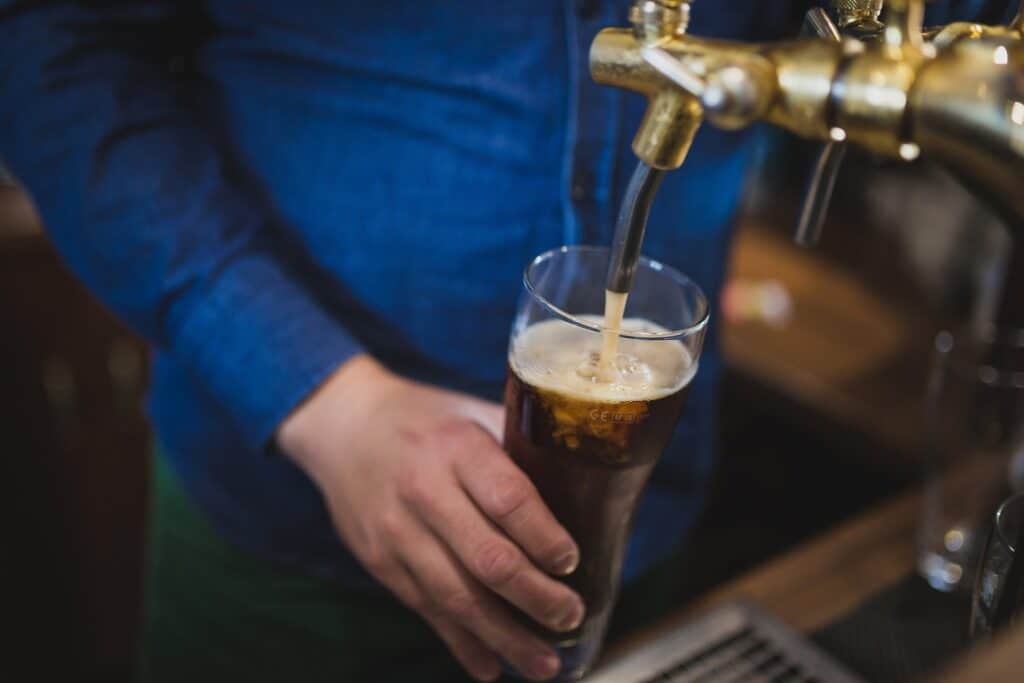
Next up, you must hold the glass at a 45-degree angle under the tap.
This is crucial in the six steps to pouring a good feckin’ Guinness. Get this wrong, and you might as well give up pouring pints now.
3. Third step – begin the pour
Thirdly, pull the handle forward until it is horizontal, and begin to fill the glass until it’s three-quarters full – or at the Harp symbol – and for the love of god, do not allow the tap to go into the Guinness.
4. Next step – patience is key

Now step four is where a lot of people get it wrong, and we’ve seen it done ourselves.
Patience is key here as you must allow the Guinness to settle for approximately 119.5 seconds. Yes, that’s right, no more, no less.
You’ll notice the nitrogen bubbles beginning to rise, and the colour of the Guinness will start to change and settle.

DO NOT assume the Guinness is ready when the barman puts it on the counter and walks away; he is merely giving it the time it needs. Be patient!
5. Nearly there – it’s top up time

Once the Guinness has settled, it’s now ready to be topped up.
Hold the glass under the tap and push the tap backwards until the dome-shaped head is formed.
The reason to push the tap backwards is to half the pressure, so you can top up the pint without destroying the bubbles you worked so hard to create.
Don’t let the head overflow and don’t try to even it with a knife or your fingers.
6. Final step – serve and enjoy

Alas, the perfect pint is ready, but lastly, if you’re serving this in a Guinness branded glass, the logo should be facing the customer, as per Guinness standards.
Now for the easy part: enjoying your creamy pint and sport that legendary foam moustache.
So there you have it, the six steps to pouring a good feckin’ Guinness.
If you didn’t know it before, now you do, and if you’ve ever had a bad pint of Guinness, it could well be because the barman didn’t follow one or more of these steps – or perhaps it’s because you didn’t get it in a real Irish pub in Ireland.
Either way, if you’ve had a bad pint in the past, we encourage you to try again because a Guinness poured correctly is a Guinness to be admired and enjoyed, just you wait and see.
So next time you head out for a pint, keep this six step process in mind, and if you see the barman missing one of the steps, don’t be afraid to give him a pointer or two – the other punters will probably thank you for it, although the barman might not.
We know that it’s not always easy to picture the process by reading about it, so check out this epic video, which will make it all the more realistic and probably have you drooling.